Rolling a joint is one of those skills that separates casual smokers from people who actually know what they’re doing. It looks simple when someone experienced does it. Their fingers move fast, the paper folds clean, and the result is tight, even, and burns like it should. But when you try it for the first time? Paper tears, weed falls everywhere, and you end up with something that looks like a crumpled receipt.
Here’s the thing though: rolling a joint is a learnable skill, not a talent you’re born with. Anyone can do it with the right technique and a bit of practice. This guide walks you through the process from start to finish, covering everything from what materials you need to the actual hand movements that make the difference between a loose mess and a smooth-burning joint.
What You Need Before You Start
Before you even think about rolling, get your materials together. Trying to roll with missing supplies or bad-quality papers is a recipe for frustration. Here’s what you need on your rolling surface:
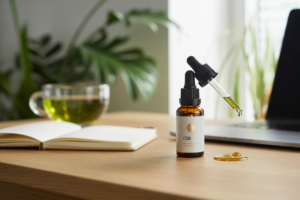
Rolling papers. Standard 1 1/4 size papers work best for beginners. Brands like RAW, OCB, and Elements are popular for a reason: they’re thin, burn evenly, and have a reliable adhesive strip. Avoid thick papers. They taste harsh and hide your mistakes less than you’d think.
A grinder. You need your cannabis ground to a consistent texture. Too fine and it’ll restrict airflow. Too chunky and it won’t burn evenly. A basic two-piece herb grinder does the job, though a four-piece with a kief catcher gives you a bonus collection over time.
Filter tips (crutches). A small piece of stiff paper or cardboard rolled into a cylinder at one end of the joint. You can buy pre-cut filter tips or tear a strip from a business card. Filters keep weed out of your mouth, add structural support, and let you smoke the joint all the way down without burning your fingers.
A rolling tray or clean surface. You’re going to spill some weed. Having a tray catches everything so nothing goes to waste.
Cannabis. About 0.5 to 0.75 grams is the sweet spot for a standard joint. More experienced rollers go up to a full gram, but start smaller while you’re learning. You want your flower properly dried and cured. Sticky, fresh cannabis is harder to grind and roll evenly.
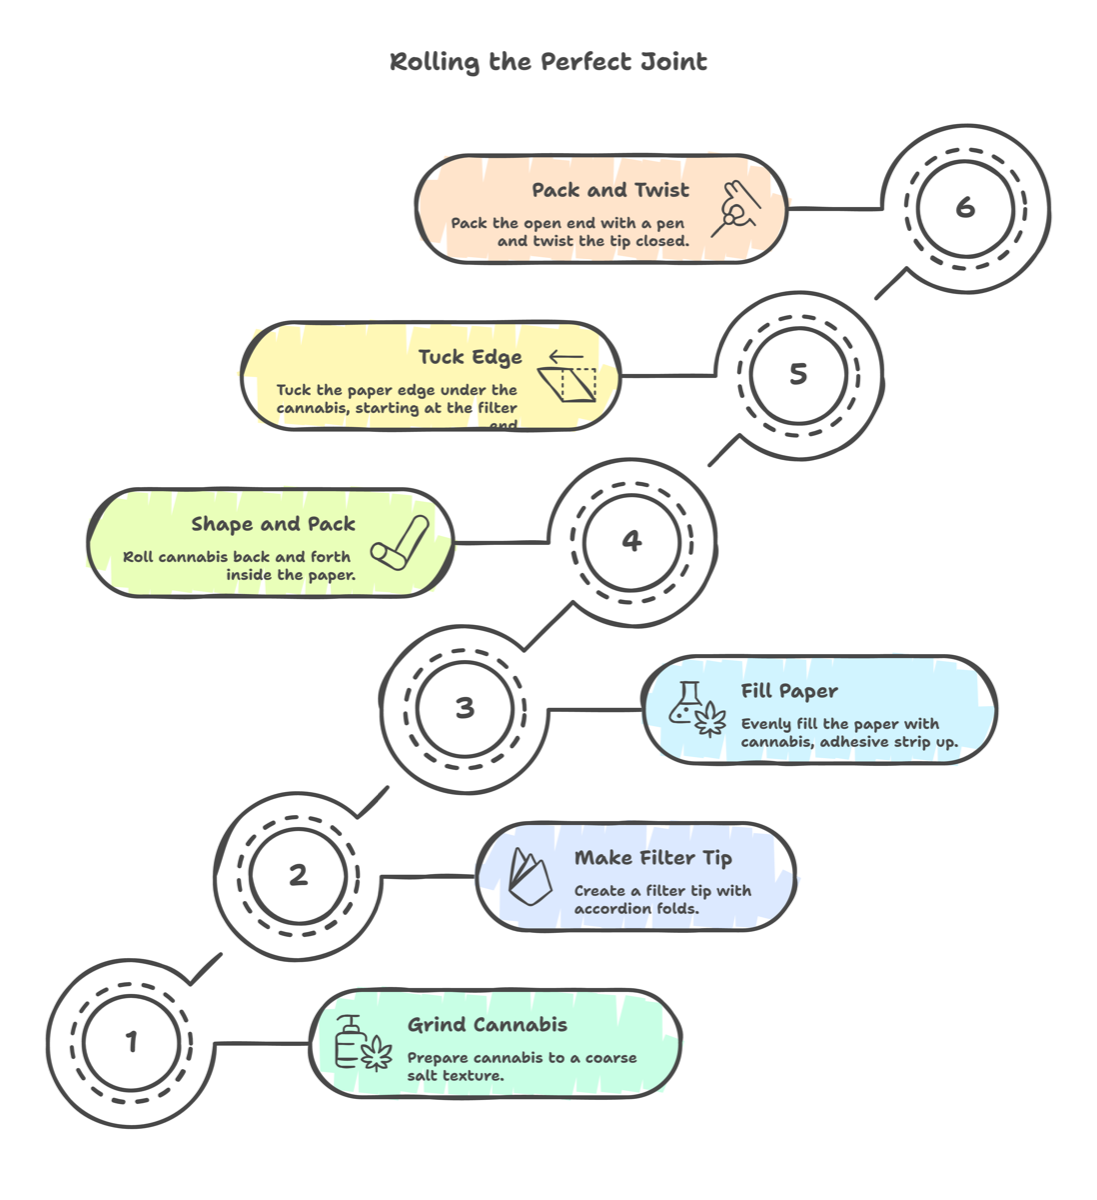
Step 1: Grind your cannabis
Break your bud into smaller pieces by hand first, removing any stems or seeds. Then drop the pieces into your grinder and give it about 10-12 twists. You’re looking for a texture similar to coarse sea salt. If you can pinch some between your fingers and it holds together slightly without clumping into a ball, that’s the consistency you want.
Don’t over-grind. Powdery cannabis packs too tightly, restricts airflow, and makes for a harsh, hard-to-draw smoke. If you’re using a quality aluminum grinder, fewer twists usually get you there.
No grinder? You can break it up with your fingers or use scissors and a shot glass. The result won’t be as uniform, but it works in a pinch.
💡 Pro Tip
If your cannabis is too dry and crumbles to dust, add a small humidity pack (like Boveda 62%) to your storage container for a few hours. If it’s too sticky, let it air out on your tray for 10-15 minutes before grinding.
Step 2: Make your filter tip
Take your filter material and fold the first few millimeters back and forth in an accordion pattern to create a small “W” or “M” shape. Then wrap the remaining paper around the outside to form a cylinder. The accordion folds on the inside catch plant material while still allowing airflow.
The width of your filter determines the width of your joint, so keep this in mind. Most people aim for a filter about 5-7mm in diameter. Too wide and the joint will be loose. Too narrow and it restricts the draw.
Some rollers make the filter after rolling, inserting it into the end of the finished joint. Both methods work. But making the filter first gives you a guide for the joint’s diameter, which is especially helpful when you’re learning. According to Leafly’s rolling guide, starting with the filter gives beginners better structural control throughout the process.
Step 3: Fill the paper
Hold the rolling paper with the adhesive strip facing you, sticky side up, along the top edge. If you’re right-handed, the filter goes at the left end. Left-handed? Put it on the right. Place the filter at one end, then distribute your ground cannabis evenly along the crease of the paper.
You want a slight cone shape: a bit less weed near the filter end, gradually more toward the tip. This gives you the classic joint shape and puts more material where you’re actually smoking, not where the filter sits. Spread the cannabis as evenly as you can. Lumps and gaps create uneven burning, which is the fastest way to ruin a joint.
Don’t overfill. A common beginner mistake is cramming too much cannabis into one paper. An overstuffed joint is almost impossible to roll tightly and draws poorly. Start with less than you think you need. You can always add more.
Step 4: Shape and pack the cannabis
This is the step most tutorials rush past, but it’s where the real work happens. Before you try to roll, use your thumbs and forefingers to gently pinch the paper and roll the cannabis back and forth inside it. You’re shaping the weed into a cylinder (or slight cone) within the paper.
Think of it like shaping clay. The motion is gentle, and you’re using the paper itself to compress and shape the cannabis into a uniform log. Spend at least 20-30 seconds on this step. Rushing it is why most beginners end up with loose, floppy joints that canoe (burn unevenly down one side).
You should feel the cannabis compact slightly. Not rock-hard, but firm enough that the shape holds when you stop moving your fingers. Research from NCBI’s cannabis combustion studies shows that packing density directly affects combustion temperature and the smoothness of each draw.
Step 5: Tuck and roll
Here’s the moment of truth. Once the cannabis is shaped into a cylinder, tuck the non-adhesive side of the paper down and around the weed. Start at the filter end because it gives you a solid anchor point. Use your thumb to roll the paper down over the cannabis while your index finger supports from behind.
The key move: tuck the paper edge under the cannabis, right against the filter, and then roll upward in one smooth motion. Your thumbs do the rolling while your index fingers guide the paper. Don’t try to do the whole thing at once. Start the tuck at the filter end and work your way across to the other side.
The tighter you can get that initial tuck, the better your joint will be. A loose tuck means a loose joint, period. If the paper wrinkles badly or tears, start over with a fresh paper. It’s not worth fighting a bad tuck.
Once the paper is wrapped around, lick the adhesive strip lightly (a thin, even moisture works better than soaking it) and press it down firmly. Run your finger along the seal to make sure it’s secure. The FDA’s tobacco product guidelines note that the quality of rolling papers affects the combustion byproducts, which is worth keeping in mind when choosing your papers.
✓ Signs of a good roll
- ✓ Firm but not rock-hard when you squeeze it gently
- ✓ No visible gaps or air pockets along the length
- ✓ The filter sits flush and doesn’t wobble
- ✓ Paper is smooth without major wrinkles or tears
- ✓ Slight cone shape (wider at the tip, narrower at the filter)
Step 6: Pack and twist the tip
You’ve got a rolled joint, but it’s probably still open at the tip with some loose cannabis visible. Use a pen, chopstick, or the drawstring from a hoodie to gently pack the weed down from the open end. Tap the joint filter-side-down on a hard surface a few times to help settle the contents.
Once it’s packed to your satisfaction, twist the excess paper at the tip into a point. This keeps everything in place until you’re ready to light up. Some people fold the tip over instead of twisting, which also works fine. The twist just makes it easier to light.
If you want to add more cannabis, now’s the time. Sprinkle a bit into the open end, pack it down, and twist. Just don’t overpack or you’ll choke the airflow.
Common mistakes and how to fix them
The joint canoes (burns down one side). This usually means uneven packing. One side of the joint has more cannabis than the other, or there’s a gap where air rushes through and creates a hot spot. Fix it by being more deliberate during the shaping step, and rotate the joint while smoking.
It’s too loose and falls apart. Not enough packing during Step 4, or the initial tuck wasn’t tight enough. More practice with the shaping motion helps. You can also try rolling with slightly damp fingers, which gives you better grip on the paper.
It’s too tight and hard to draw. You packed too hard or used cannabis ground too finely. Ease up on the pressure. You should be able to draw air through the joint before lighting it. If you can’t, the pack is too dense.
The paper keeps tearing. You’re either using cheap papers or applying too much pressure. Switch to a quality brand like RAW unbleached papers. Also, make sure your fingers aren’t too wet when you handle the paper.
Cannabis falls out the end. Your filter isn’t snug enough, or you didn’t pack the material around the filter properly. The filter should fit tightly inside the paper with no visible gaps. According to High Times, the filter placement is what most beginners struggle with the most.
Alternative rolling techniques worth trying
The dollar bill method. If hand-rolling gives you trouble, fold a dollar bill (or any piece of paper) in half, place your cannabis inside, roll it back and forth to shape the material, then slide a rolling paper behind the cannabis and roll it up. The bill does the shaping work for you. It’s a great training wheel technique.
Inside-out (backroll) technique. Hold the paper with the adhesive strip on the outside, facing away from you. Roll normally, lick through the paper to activate the adhesive, then tear or burn off the excess paper. You end up with a thinner joint that tastes cleaner because there’s less paper. It’s a more advanced technique but worth learning. Weedmaps has a good visual walkthrough of this method.
Pre-rolled cones. If rolling just isn’t your thing, buy pre-rolled cones and fill them with your ground cannabis using a packing tool. It’s not cheating. Plenty of experienced smokers prefer cones for consistency. Products like pre-rolled joints from your local dispensary are another option if you want to skip the process entirely.
📝 Important note
King size papers give you more room to work with but are harder to roll tightly. Start with 1 1/4 size until your technique is solid, then experiment with bigger papers when you’re comfortable.
How to light your joint properly
You’ve rolled it. Now don’t ruin it with bad lighting technique. Hold the joint at a slight angle with the twisted tip up. Use a lighter or hemp wick to toast the tip while rotating the joint slowly between your fingers. You want to create an even cherry (the glowing ember) across the entire tip.
Don’t put the joint in your mouth and puff while lighting like you would a cigarette. This causes an uneven burn from the start. Instead, toast the tip first, let it catch, then take your first draw. The CDC’s cannabis information page recommends being aware of combustion byproducts when smoking any plant material.
If the joint starts canoeing after you light it, wet your finger and dab the side that’s burning faster. This slows the burn on that side and lets the other side catch up. Prevention is better than the fix though, so work on your packing consistency.
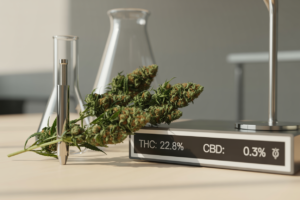
Choosing the right strain for your joint
Not all cannabis rolls the same. Strain moisture, stickiness, and density all affect the rolling experience. Dryer strains grind more uniformly and are easier to work with. Sticky, resinous strains produce better flavor and effects but can gum up your grinder and make rolling trickier.
For a good social smoke, consider balanced hybrid strains that offer relaxation without heavy sedation. If you’re rolling for a solo evening, an indica strain optimized for sleep can be a great choice. For creative sessions, try a sativa strain with uplifting effects.
CBD flower is another option that’s worth mentioning. If you want the ritual of rolling and smoking without strong psychoactive effects, CBD-rich flower gives you the experience with a milder, more relaxed outcome. It’s also good for mixing with THC flower to moderate the intensity.
Practice tips that actually help
If you’re new to rolling, don’t waste your good cannabis on practice sessions. Use dried herbs from the kitchen (oregano, mint, or tea leaves work fine) or even finely chopped tobacco. The point is to build muscle memory with the paper and your fingers without caring about the contents.
Roll five joints in a row. Then five more. Then five more. Your first few will look rough. By the time you’ve rolled 15-20, you’ll notice your fingers know where to go without thinking about it. That’s the muscle memory kicking in. A PubMed-indexed motor learning study from 2019 found that fine motor skills typically show measurable improvement after 15-20 repetitions of a new task.
Watch your own hands while you roll. Most people look at the paper, but focus on what your thumbs are doing during the tuck. That’s where the technique lives.
💡 Pro Tip
Wash and dry your hands before rolling. Oils and moisture from your skin transfer to the paper and can affect how it sticks and burns. Clean, dry fingers give you better grip and a cleaner seal.
Frequently Asked Questions
How much cannabis should I put in a joint?
A standard joint uses 0.5 to 0.75 grams. King size papers can hold up to 1.5 grams, but start small. You can always roll another one, but you can’t unsmoke an overpacked joint that gives you more than you bargained for.
Do I need a filter tip?
Technically no, but practically yes. Without a filter, you’ll get bits of cannabis in your mouth, waste the last portion of your joint, and risk burning your lips. Filter tips also make the joint easier to hold and pass. There’s really no good reason to skip one.
Why does my joint burn unevenly?
Uneven burning (canoeing) happens because of inconsistent packing density, air pockets inside the joint, or lighting only one side of the tip. Focus on even distribution during the filling step and properly toast the tip when lighting. Wind can also cause uneven burns, so try to light up in a sheltered spot.
What’s better: joints, blunts, or pipes?
It comes down to personal preference. Joints use thin paper and let you taste the cannabis. Blunts use tobacco leaf wraps that add flavor and a nicotine buzz. Pipes require no rolling skill at all. For portability and the classic cannabis experience, joints are hard to beat. See the DEA’s cannabis fact sheet for general consumption information.
Can I save a half-smoked joint for later?
Yes. Put it out by pressing the cherry against an ashtray or hard surface (don’t crush the whole joint). Store it in a small tube or container. It won’t taste as fresh when you relight it because the remaining cannabis has absorbed some combustion byproducts, but it still works fine. Some people use a proper storage setup even for partial joints.
⚠️ Disclaimer
This article is for informational purposes only and does not constitute medical advice. The information provided about cannabis is current as of March 2026 but may change. Always consult with qualified healthcare professionals for medical advice and treatment options. Cannabis laws vary by jurisdiction. Check your local regulations before purchasing or consuming cannabis products. For our full disclaimer, visit cannastoreams.gr/disclaimer.